Yesterday was an adventurous day in the kitchen.
I put to use one of my new Christmas presents! I received Bakerella's Cake Pops book from my mom. Yay!!

You'd think I never want to see another sweet again, after the 25 (err... 23) days of Christmas Cookies, but that is definitely not the case. I'm a sweets girl all the way. Give me a choice between a DQ Blizzard and a $25 steak, and I will choose the ice cream every time.
Now, if you haven't heard of cake pops yet, let me explain. They're little balls of cake-frosting dipped in candy coating or melted chocolate, on a stick. Because everything is better on a stick, right? They're basically little balls of sugary goodness. You can do different flavor-combinations, but I went pretty basic for my first time. I chose to do vanilla and chocolate.
You first start off by baking a cake. Cake mix will do just fine, since you will be crumbling it all up anyway. Once it cools, you crumble it up into teeny tiny pieces.

Then, you add 3/4 can of frosting. I used vanilla frosting with the white cake. (Although I imagine strawberry frosting with the white cake would be super-good.)

Then, you roll it into little bitty balls, about 1-inch in diameter. You should get 48 per cake.
 |
| Action shot! |
 |
| Cake ball, pre-dipped. |
Then, you pop the balls into the fridge.
That is the basis of most of the cake pops recipes in the book. Then, Bakerella has all these different designs you can make. Ladybugs, soccer balls, clowns (a lil scary looking), Christmas trees, even little bride-and-groom wedding favors. (Oh, how I wish I could have had them at my wedding. So cute! Maybe I will make some for my 1-year anniversary.)
I chose to make the Ice Cream Cone Sundaes for my first batch. I thought maybe I could bring myself a lil' taste of summer in the middle of the winter.

For these, you have to get some regular-size sugar cones. And then, you cut them down with a serrated knife to be 'miniature-sized.'
 |
| Yes, it took awhile to saw all these down. And yes, quite a few broke. |
I grabbed some styrofoam at good ole' Wally World and covered it with tissue paper and poked holes in it so my ice cream cones could stand up.
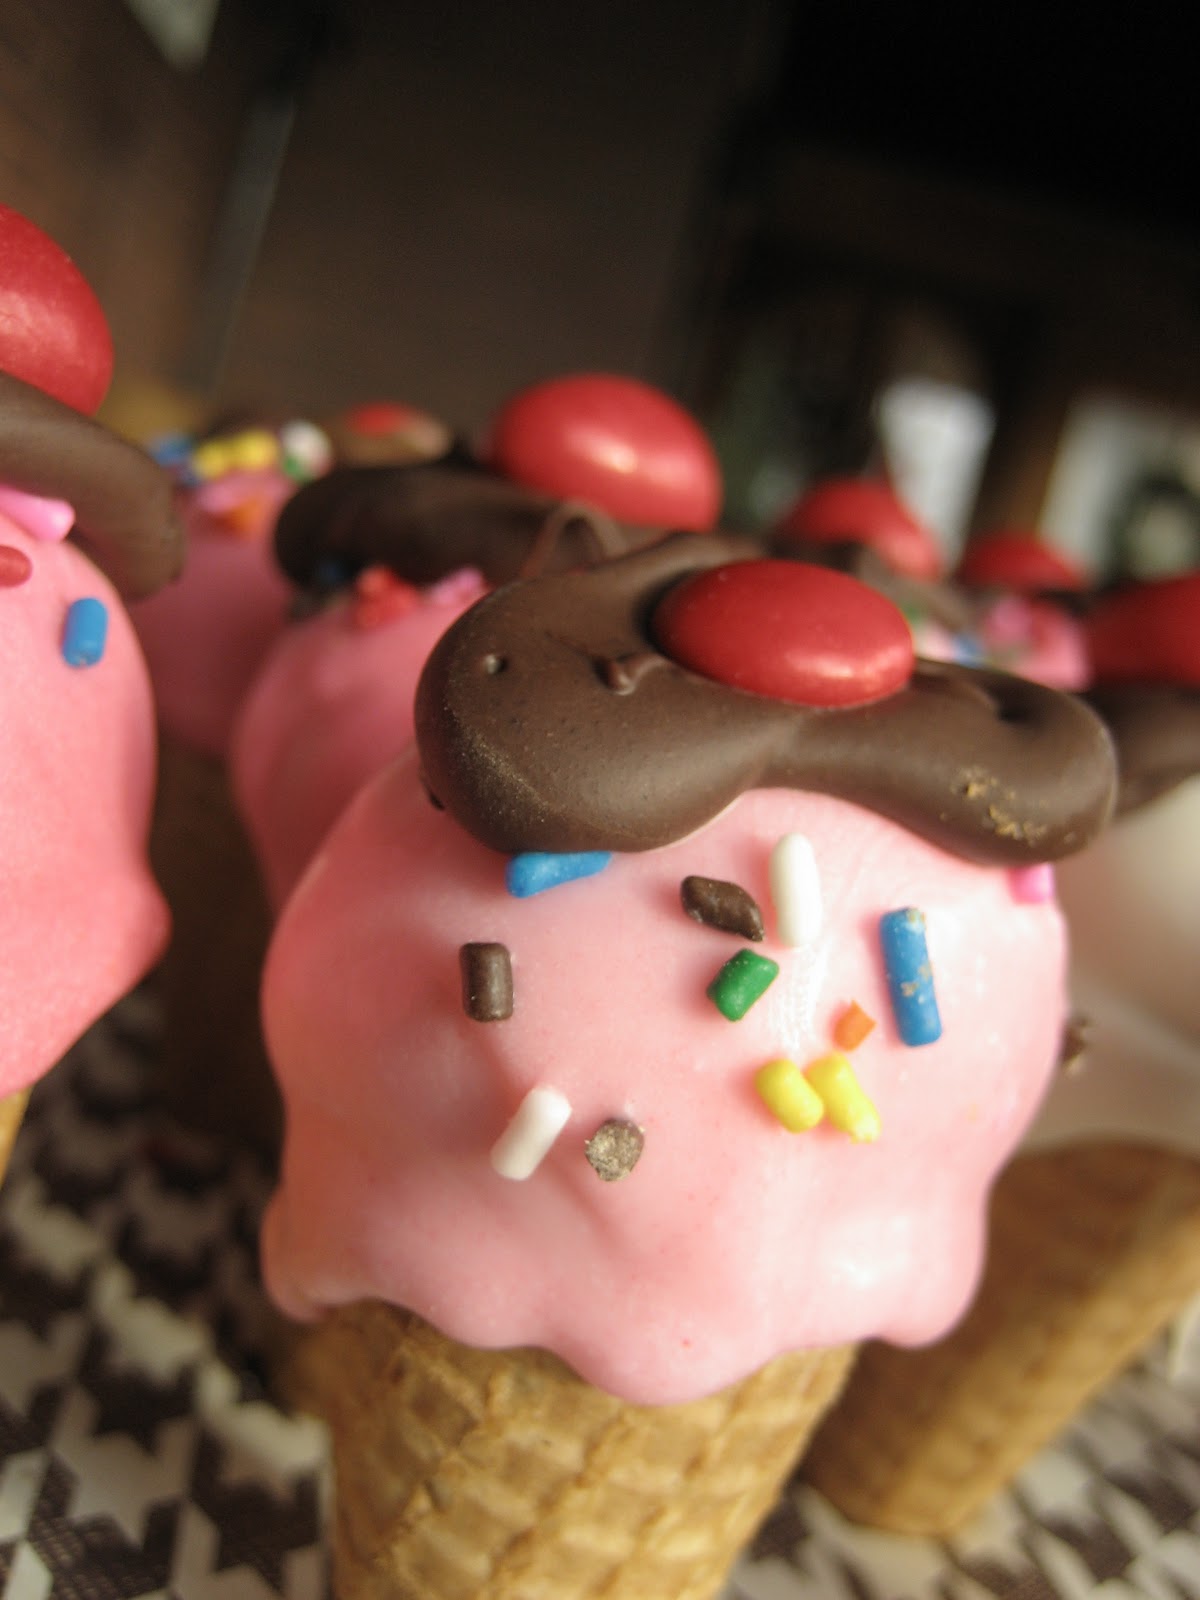
Once your cones are ready, you melt some candy coating in a deep bowl. (I dyed some white candy coating pink. But you must use oil-based food coloring, or it will ruin the candy coating! You can also buy already-colored candy coating.)
Then, you plop a cake ball in the candy coating, and make sure it is totally coated. Remove it with a lollipop stick and place it on the ice cream cone.

Sadly, the above picture is my only action shot. My photographer gave up and went in the other room to watch some TV. I have no idea why he would get bored so quickly... I mean it was only the fourth hour of the project! By the way, if you make these make sure you have lots of time. I think from beginning to end, it took 6 hours. But totally worth it, to me!
The good news about these is that you don't have to be perfect! Ice cream cones are always drippy. And you don't have to worry about the hole that the stick will leave behind on top, because you end up covering that up with faux hot fudge sauce.
After you have all your ice cream cones assembled, you add the hot fudge. I just melted some semisweet chocolate chips in a plastic baggie, snipped off the corner, and squiggled it on all haphazardly. Then, add a red m&m for a cherry and you're done! Oh, and don't forget the sprinkles, because sprinkles make all baked goods even cuter! (Except maybe cinnamon rolls... I just can't picture it.)

Are these cute or what? Yes, they're extremely sweet to taste, but oh-so-sweet to look at!

I created an 'Ice Cream Cone Display' by carving out some holes in a cardboard box and covering it with cute scrapbook paper. I like this look much better than the tissue-covered styrofoam. And, it's less messy, as the styrofoam seemed to crumble everywhere.
 |
| Whoops! Looks like someone dropped their cone! |
All in all, this was a fun lazy afternoon project. A perfect way to wrap up 2010!
Now I'm off to go for a run outside in this amazing 50* weather! The sun is out and I'll be wearing shorts! Who would've ever guessed??
Comments